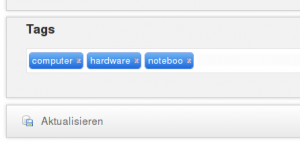
In a recent Grails project the customer asked for support of a tagging functionality for some domain classes. In order not to clutter the tagspace too much auto-complete should be available when editing the tags.
In fact there is a very simple and elegant solution for this. On the application’s side, there’s the Grails Taggable plugin available. For the frontend side JQuery has a nice plugin called Tagit plugin caring about editing tags and auto-completion. Both play together very well – showing this is the intention of this post.
Setting up the ‘to-be-tagged’ domain class
After installing the taggable plugin the usual way using
grails install-plugin taggable
setting up the ‘to-be-tagged’ domain classes is fairly trivial, the only thing left is to add ‘implements Taggable’ to the ‘to-be-tagged’ domain classes, e.g.
import org.grails.taggable.Taggable
class Product implements Taggable {
    String name
    double price
}
By marking the domain class with the taggable interface it gets injected some methods for manipulating its tags on instance level
- addTag,
- addTags,
- getTags,
- parseTags,
- removeTag,
- setTags
as well as some new methods on class level:
- getAllTags,
- getTotalTags,
- countByTag.
Setting up JQuery Tagit in the Grails application
Since the Tagit plugin depends on JQueryUI for autocompletion, lets first install this in the application. Using the resources plugin for managing our css/js/image resources is also a good idea:
grails install-plugin jquery-ui
grails install-plugin resources
Download an unzip the latest version of tagit (1.5 when authoring this post) to some temporary location. We basically need to copy three files contained in the zip:
tagit/js/tagit.jsto<grailsapp>/web-app/js- one of
tagit/css/tagit-<yourchoice>.cssandtagit/css/ui-anim_basic_16x16.gifto<grailsapp>/web-app/css
Since we’ve added resources to our project let’s declare them as a module for the resources plugin. For more information on this concept, checkout the docs of the Grails resources plugin.
modules = {
 'tagit' {
 dependsOn 'jquery-ui'
 resource 'css/tagit-gradient-blue.css'
 resource 'js/jquery/tagit.js'
 }
}
Editing the view
Next thing is the frontend. To get started, let’s generate a controller and views for the given domain class:
grails generate-all Product
For simplicity, we’ll only care about the edit view for the rest of this post. The code of the generated view is the starting point. First we need to make use of the declared resources and second we need to render the already existing tags and apply the tagit plugin.
...
<%-- in the head section --%>
...
<%-- in the form section --%>
L.3 adds the js/css resources. L.9 is requires some explanation, we’re decorating the ul tag having an attribute name='tags' with the tagit widget. The parameter select=true is crucial since it passes back the chosen tags upon form submission as a multivalued select-box. Specifying a tagSource URL provides auto-completion. In l.15-19 we’re displaying the existing tags in a simple unordered list. N.B. the name attribute mirrors the name of the select-box being created.
Editing the controller
The ProductController must be modified to store given tags upon form submission and to provide auto-completion. For storing tags, the update action requires a single line change:
productInstance.properties = params
productInstance.tags = params.tags // new line to be inserted
tags isn’t a real property it is not covered by l.69 and an explicit call to setTags() is necessary.
For auto-completion a new action tags is introduced:
def tags = {
  render Tag.findAllByNameIlike("${params.term}%")*.name as JSON
}
JQuery-UI auto-completion passes the partially entered tag in request parameter term. The code above searches for all tags starting with the given term and returns their name as JSON.
Result & Conclusion
With these very few lines of code a comfortable user interface for tagging with auto-completion could be established. Kudos to the authors of the JQuery Tagit and Grails Taggable plugins. These two plugins are a perfect match.